
The radio frequency identification (RFID) system used for the identification and tracking of objects makes use of an RFID reader and a tag. The main parts of the authentication system include the transceiver, antenna, and decoder.
The transceiver can function as either a transmitter or a receiver. It includes an oscillator to generate a continuous signal, which is modulated to a required frequency and then transmitted into the air through the antenna.
The antenna converts the electrical signal into an electromagnetic signal that is efficiently propagated through the air.
When an RF signal is detected at the antenna from a tag, the decoder aids in retrieving the data.
The importance of RFID systems is increasing day by day due to their powerful capabilities in automatic identification, localization, and access control. However, RFID techniques are plagued by security and privacy issues due to the underlying wireless communication channel.
Also Check: Interesting RFID-based Projects
To address this, we propose an efficient authentication scheme that utilizes pseudorandom number generators (PRNG) and some simple cryptographic operations.
Since the current generation of tags comes with built-in pseudo-random generators, implementing these operations is possible with low complexity. The secret information stored inside the tags is communicated more securely, ensuring confidentiality, integrity, and authentication.
The security of our proposed scheme is analyzed against different attacks on RFID and compared with the performance of some existing protocols. Experimental results demonstrate a significant improvement in security with an average cost when compared with existing techniques.
This is a proposed design of a smart and secure system topology for login using RFID technology. With this technology, the device can be configured to authenticate and then set selected functions, such as a login system or attendance system.
The EM 18 RFID module is used to read the RFID tags and devices, and Arduino is used to process the data and set functions like lock, unlock, or authentication. If the correct RFID tag is scanned, it authenticates and recognizes the person, displaying the result in the serial monitor. Otherwise, it indicates that the RFID is not correct.
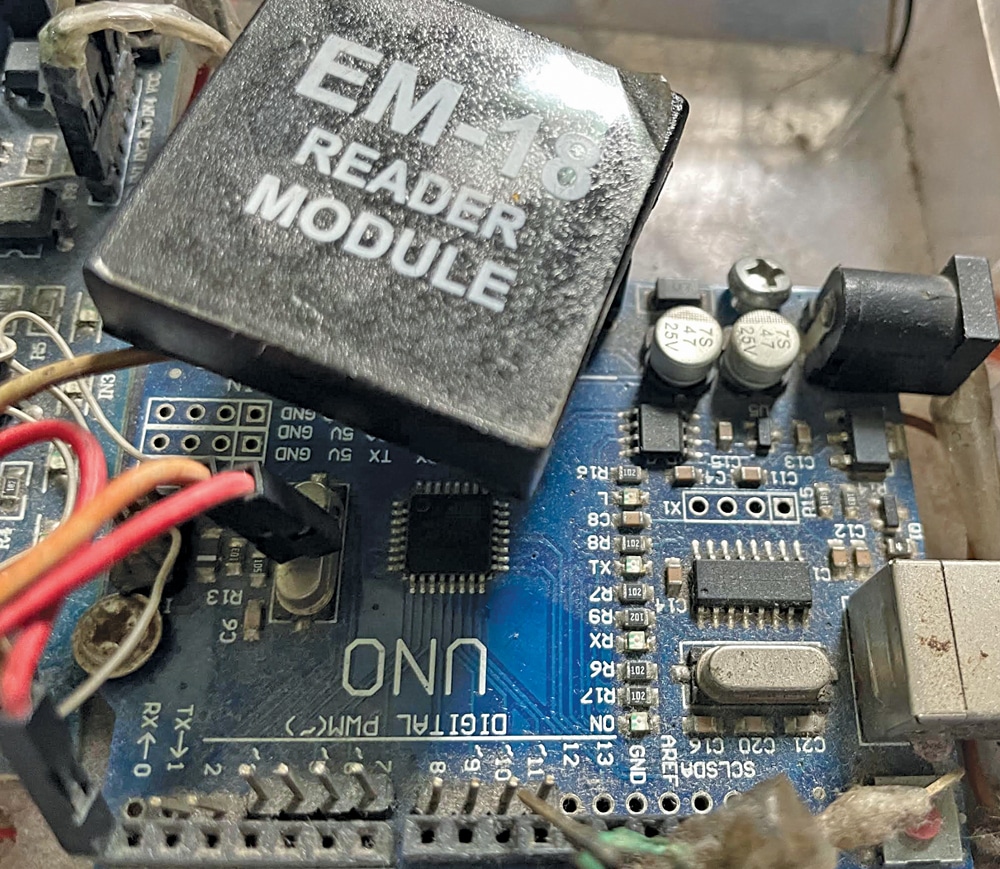
Fig. 1 shows the prototype of the project tested at EFY Lab. The components used in the project are listed in the Bill of Materials table.
| Bill of Materials | |
| Components | Quantity |
| Arduino Nano/Uno (MOD1) | 1 |
| EM18 RFID reader module (MOD2) | 1 |
| Jumper wires | 4 |
| RFID card/Tag for testing | 1 |
| 5V adaptor | 1 |
DIY Authentication System – Circuit Diagram
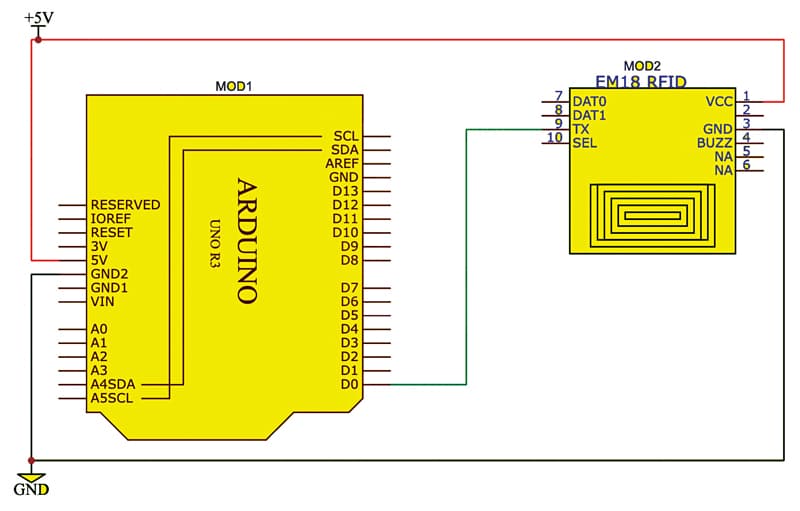
Fig. 2 shows the circuit diagram of the project, which is built around an Arduino board (MOD1) and EM18 RFID reader module (MOD2). Connect the RFID module as shown in Fig. 2. Here, the RFID module uses the same RX pin (D0) of the Arduino that is used for hardware code upload.
So, if you have connected that pin and then uploaded the code, you will get the uploading error. While uploading the code, make sure you disconnect the TX pin of the EM 18 module from the D0 pin of the Arduino board. After uploading the code, open the serial monitor and connect the serial pins of the EM 18 module to the Arduino pins.
Arduino Code for RFID-based Authentication System
The code is developed using the Arduino IDE. The EM 18 RFID module operates on serial communication; when RFID is detected, it sends the data over serial pins. Here, the Arduino hardware serial pin RX (D0) has been used.
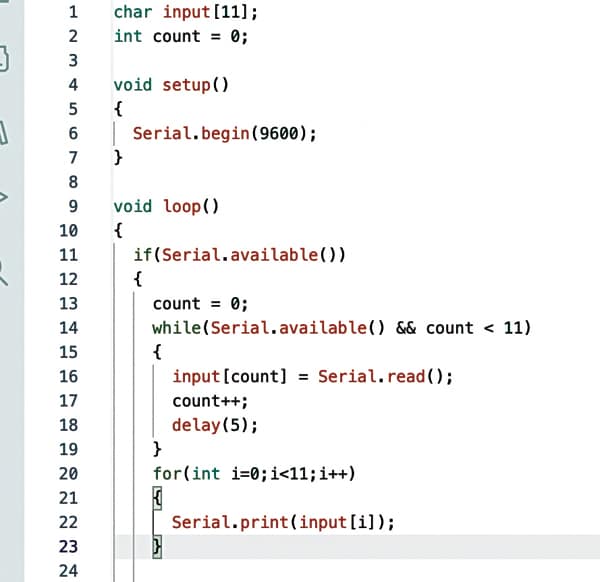
In the code, the setup function is created, and the serial port is started using the specified baud rate of EM 18, which is generally 9600. Then, the loop function is created, and the serial data availability is checked. If the right RFID is detected, it prints in the serial monitor along with the name.
Upload the source code by selecting the port and board. Next, change the RFID number to the correct RFID number of your card in the code and upload the code. Fig. 3 shows a snippet of the source code.
Also Check: Innovative Arduino Projects Ideas
Testing
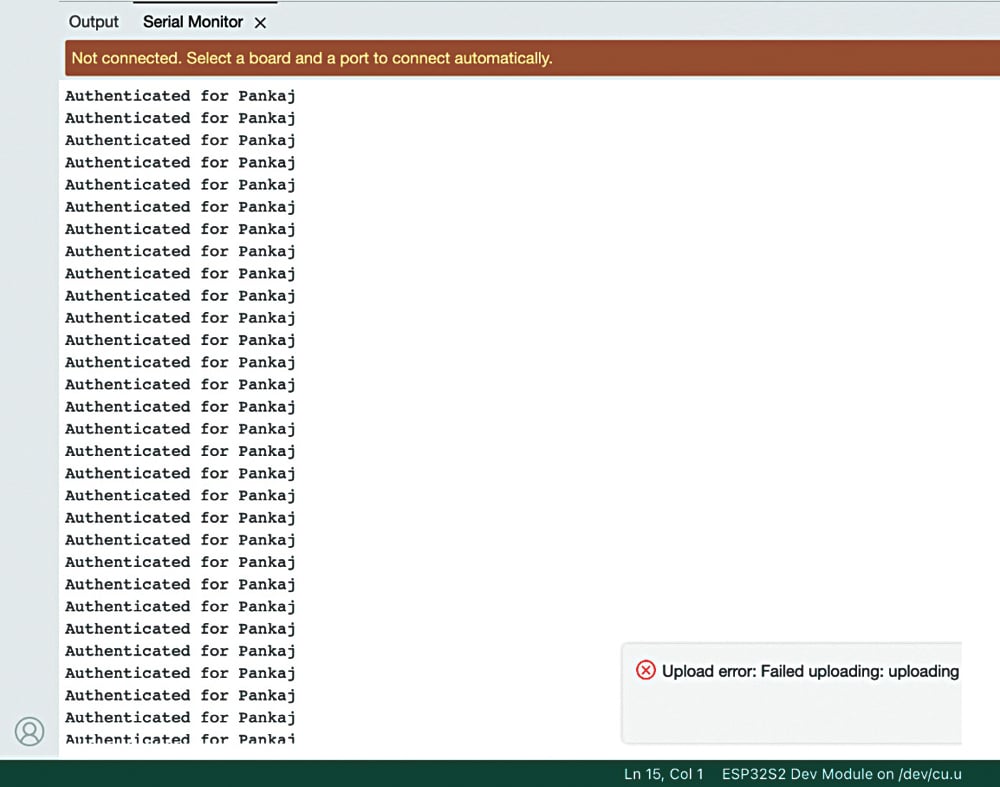
To test, connect the Arduino to a laptop, open the serial port, and then bring the right RFID tag near the EM 18 module. If it is the correct RFID tag, it will print or perform as has been set in the code. If it detects the right RFID card, it prints on the serial monitor: ‘authenticated for Pankaj’ (author’s name), as shown in the snippet of the serial port in Fig. 4.
Pankaj A. Raut is a software engineer at HCL Tech. His interests include computer vision, python, artificial intelligence, machine learning, and IoT
The post RFID-Based Authentication System Using Arduino appeared first on Electronics For You.
View more at https://www.electronicsforu.com/electronics-projects/diy-authentication-system.
Credit- EFY. Distributed by Department of EEE, ADBU: https://tinyurl.com/eee-adbu
Curated by Jesif Ahmed