
With the advent of artificial intelligence, robots find application in various sectors such as industry, homes, bars, restaurants, events, agriculture, and even space. In light of the broad scope of robot applications, this smart water serving robot was developed. While there are several water-serving robots on the market, many are costly complex in design, and heavy in weight.
This economical and lightweight water-serving robot addresses this issue with a simple design. It demonstrates high precision in its control.
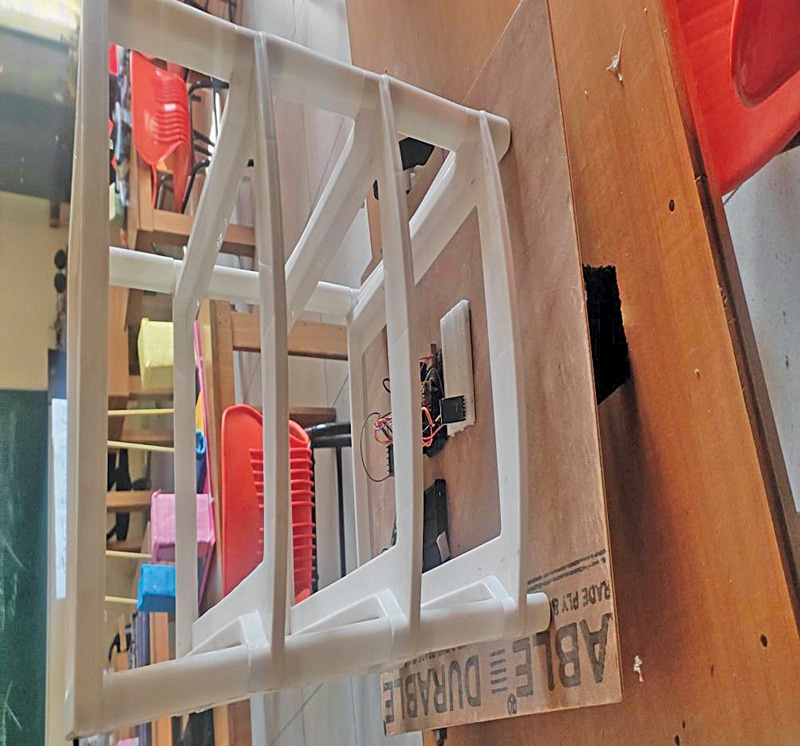
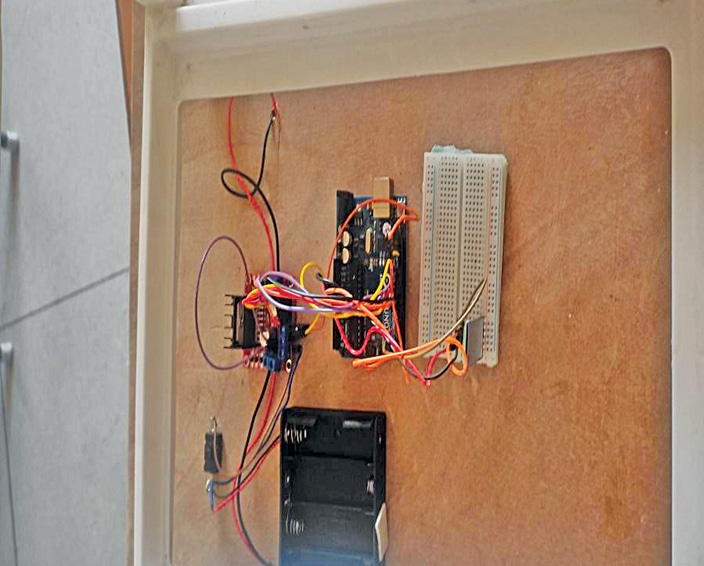
The Smart Water Serving Robot’s prototype is shown in Fig. 1. The components required for this device are listed in the Bill of Materials table.
| Bill of Materials | |
| Components | Quantity |
| Arduino Uno (MOD1) | 1 |
| Bluetooth HC-05 (MOD2) | 1 |
| L298 motor driver | 1 |
| 12V, 500-RPM geared DC motor | 2 |
| Battery module 18650, 3.7V 2000mAh | 3 |
| Battery holder | 1 |
| Breadboard | 1 |
| Jumper wires | 20 |
| Hardware parts such as 100cm diameter 4 tyres, wooden planks, robot chassis and screws | |
Smart Water Serving Robot – Circuit and Working
The circuit diagram of the smart water serving robot is shown in Fig. 2. It is built around Arduino Uno (MOD1), Bluetooth HC-05 (MOD 2), an L298 motor driver, and a few other components.
Also Check: Interesting Arduino Projects
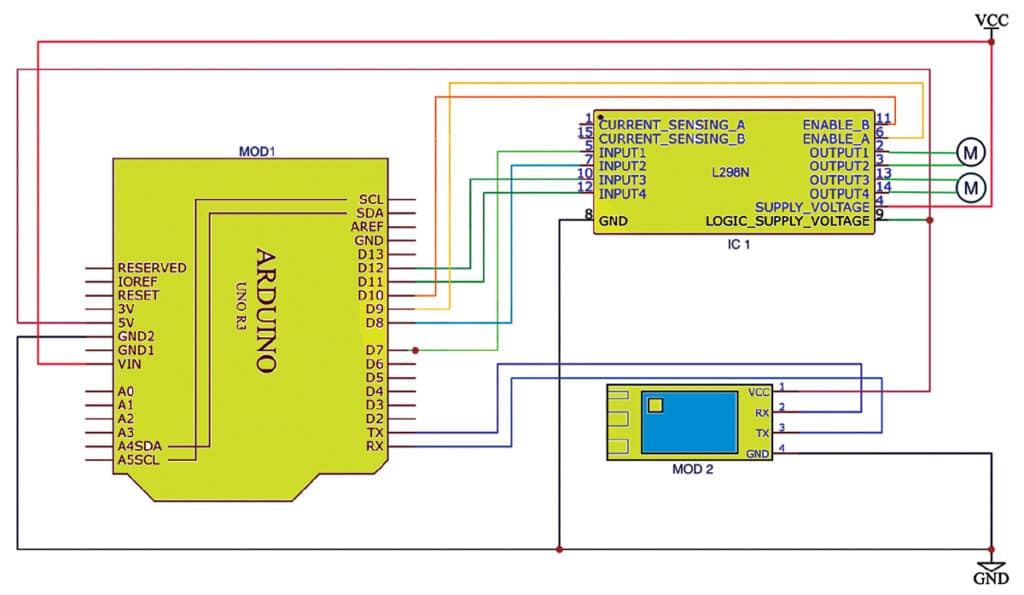
Connect the VCC as per the circuit diagram to the positive terminal of the 12V battery and GND to the negative terminal. For this setup, I used a battery holder and three 3.7V batteries. This totals 11 to 12V input for the motors (3.7Vx3=11.1V). The Arduino utilizes the Vcc pin to convert this to 5V using its built-in voltage regulator. Alternatively, a single 12V battery can be used.
The pins of the HC-05 Bluetooth module, such as Vcc, RX, TX, and GND, are connected to the corresponding Arduino Uno pins of Vcc, TX, RX, and GND, respectively.
Additionally, Arduino Uno pins D9, D10, D7, D8, D11, and D12 are connected to enable pins A, B, IN1, IN2, IN3, and IN4 of the L298 motor driver, respectively. The 500-RPM DC motor is attached to output1 and output2 pins 2 and 3, as well as output3 and output4 pins 13 and 14 of the L298 motor driver.
Arduino Code for Smart Water Serving Robot
Based on the circuit shown in Fig. 2, the software was developed on the Arduino platform. Arduino Uno has digital pins D2 through D13 and analogue pins A0 through A7. Arduino Uno sends commands to the L298 motor driver, which in turn controls the motors to move forward, backward, left, or right.
Arduino Uno receives commands from an Android mobile app through the HC-05 Bluetooth sensor. The Android app can be downloaded from the Google Play Store.
When the user sends commands like ‘f’ or ‘F’ from the mobile app to Arduino Uno, the vehicle moves forward. Sending ‘B’ or ‘b’ commands the vehicle to move backward. Commands ‘L’ or ‘l’ initiate a left turn, ‘R’ or ‘r’ a right turn, and ‘S’ or ‘s’ makes it stop.
This allows for convenient control of the water-serving robot through a mobile device. The robot can be deployed in schools, college campuses, or events to serve water to staff during examinations or functions, reducing human effort, time, and cost.
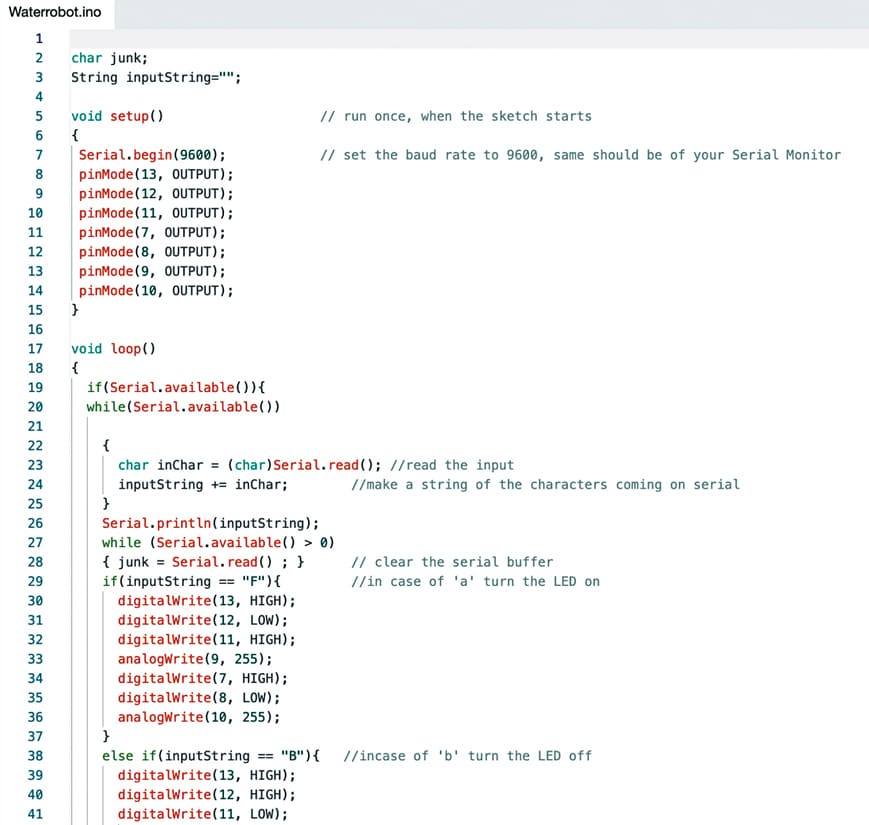
All functions are written on the Arduino platform and saved in the sketch as Waterrobot.ino. Fig. 3 shows a snippet of the source code.
Before assembly, upload the source code to Arduino by selecting the proper board and port.
Construction and Testing
To build this robot, Bluetooth technology was utilized along with electronic components, including Arduino Uno, Bluetooth module (HC-05), L298 driver, 12V, 500 RPM geared DC motor, 100cm diameter wheel with a 6mm shaft, breadboard, jumper wires, USB cable, wooden plank, battery holder, and battery module 18650 3.7V 2000mAh. The programming of the device is done on the Arduino software.
The L298N-based motor driver module 2A is a high-power motor driver perfect for driving DC-geared motors. It can control up to 4 DC motors, or 2 DC motors with directional and speed control.
Make connections as per the circuit diagram. Provide voltage from the battery holder 18650 Li-ion cell. Check the status of the HC-05 Bluetooth sensor; if the LED is glowing, it is operational.
Once the HC-05 is on, open the serial Bluetooth terminal app on your mobile, switch on your Bluetooth, check the device list to connect, and connect with HC-05 from the list. You may set a password like ‘0000’ or ‘1234’ if prompted. Once the mobile is connected to HC-05, send signals like characters ‘f’ for forward, ‘b’ for backward, ‘r’ for right, ‘l’ for left, and ‘s’ to stop to control the vehicle.
Mechanical Assembly
Cut a wooden plank to make the serving robot chassis, then attach the wheels to the motors. On top of the chassis, affix a container for holding water or food to be served to people. Alternatively, a readymade robot body with a container can be purchased from the market.
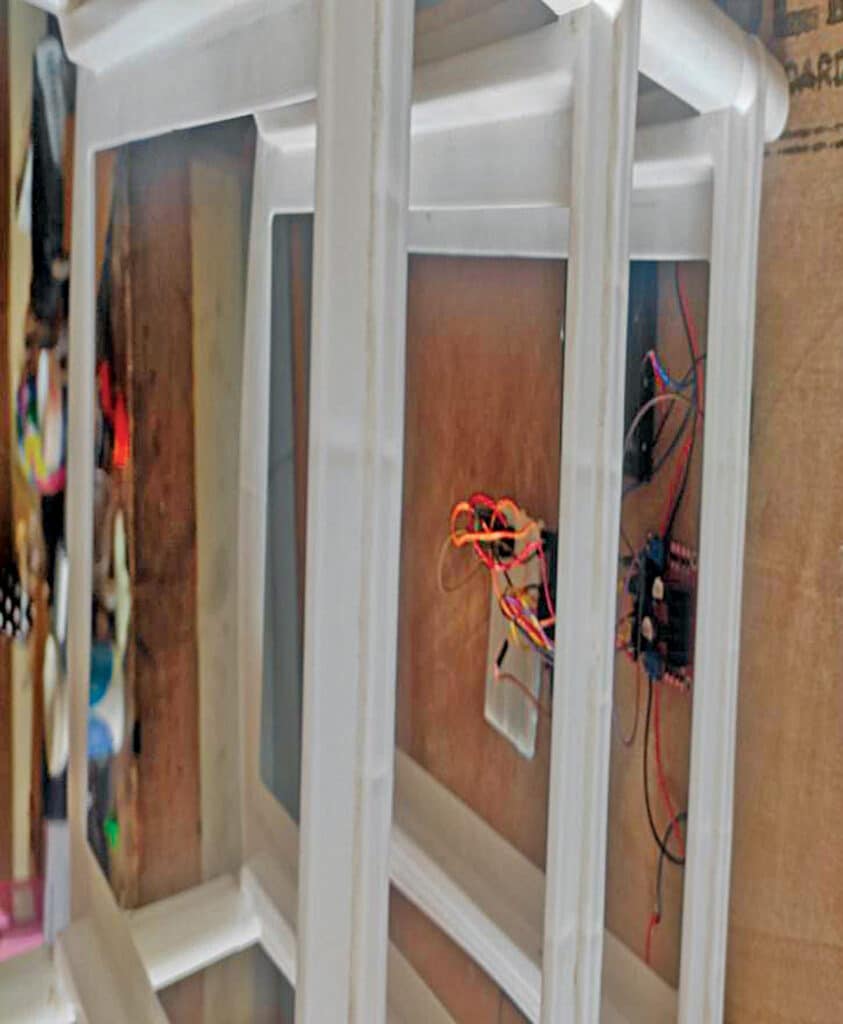
Fig. 4 shows the robot chassis used by the author, while Fig. 5 illustrates how the assembled circuit on the breadboard is fixed onto the robot circuit.
Navpreet Singh Tung is in charge of the Artificial Intelligence and Robotics Lab at Sandeepani Gurukul in Pathankot, Punjab, India
The post Smart Water Serving Robot appeared first on Electronics For You.
View more at https://www.electronicsforu.com/electronics-projects/water-serving-robot.
Credit- EFY. Distributed by Department of EEE, ADBU: https://tinyurl.com/eee-adbu
Curated by Jesif Ahmed